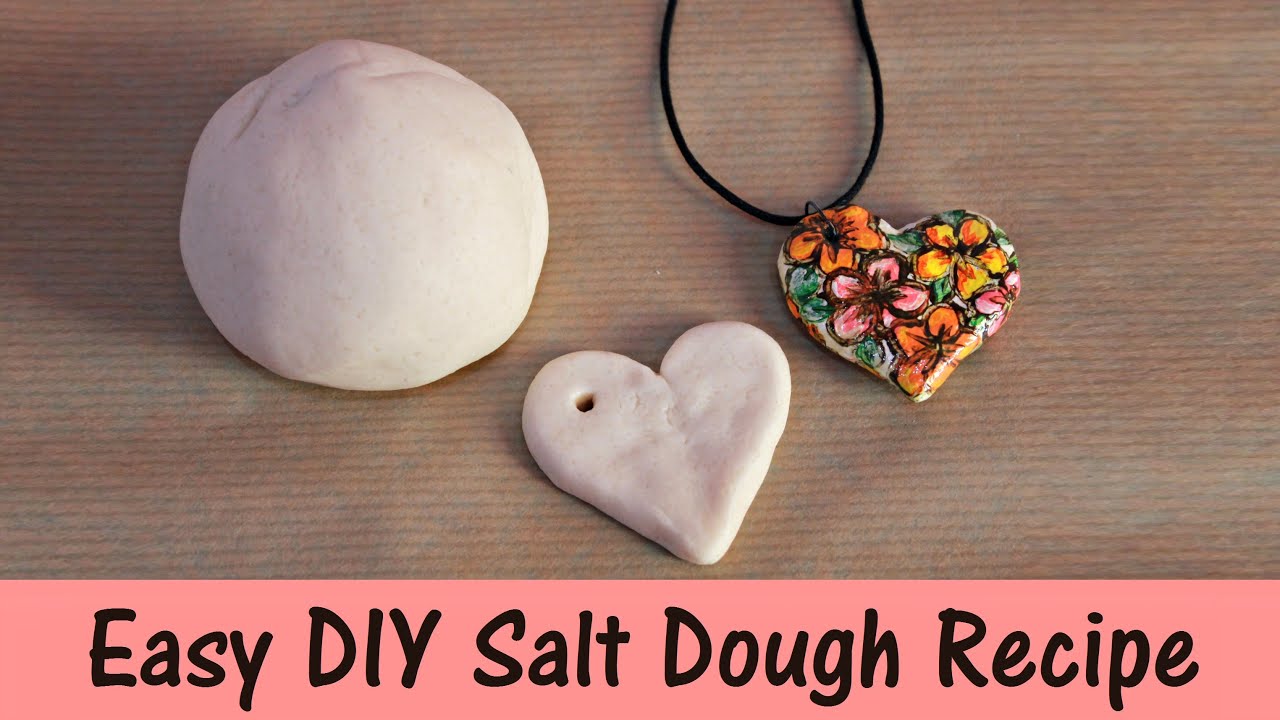
This simple and easy salt dough recipe is the perfect rainy day activity… Kids will master valuable kitchen skills while learning how to make salt dough, and then spend hours playing with it!
We encourage our kids to get outside and play as much as possible during the summer, but inevitably there’s going to be those rainy days when outside play isn’t an option — like today…
Rather than turning to video games and television for entertainment though, I gathered up my younger three children for a quick kitchen lesson on how to make salt dough. And it actually turned out to be loads of fun AND educational! #momwin
While my kids think making and playing with this salt dough recipe is all fun and games, they’re actually learning a whole slew of valuable skills — like brushing up on their math, how to measure solids and liquids, and what happens when you mix certain ingredients. Just to name a few!
And with only three ingredients — flour, salt, and water — this simple salt dough recipe is the perfect intro to kitchen basics. Luckily, I picked up some inexpensive fresh flour and salt at the grocery store earlier this week in anticipation of a rainy day!
I gave Camden the job of measuring out the flour, showing her how to level it off for a consistent measurement.
And I helped Drew measure the water, showing them all how the liquid should be level with the lines on our Pyrex measuring cup.
Then they all took turns mixing the salt dough, and I gave a quick demonstration on how to knead dough. You know they were getting quite antsy to start playing by this point!
They had a blast playing with their salt dough. I gave them a kid-sized rolling pin and some cookie cutters to use. This kept them busy ALL afternoon! These plastic clay tools are super inexpensive and would be fun to play with, as well.
- Mix 2 cups of plain flour and 1 cup of salt together in a large bowl.
- Add 1 cup of water. Add it in slowly as you may need less.
- Knead the mixture into a dough.
- Get creating!
3-Ingredient Salt Dough Recipe

This 3-ingredient simple and easy salt dough recipe is the perfect rainy day activity… Kids will master valuable kitchen skills while learning how to make salt dough, and then spend hours playing with it!
Prep: 5min
Total: 5min
Serving Size: 2.5 cups
Nutrition Facts: calories 0 calories, Carbohydrate 0 grams carbohydrates, Cholesterol 0 milligrams cholesterol, Fat 0 grams fat, Fiber 0 grams fiber, Protein 0 grams protein, Saturated Fat 0 grams saturated fat, servingSize 2.5 cups, Sodium 0 milligrams sodium, Sugar 0 grams sugar, Trans Fat 0 grams trans fat, unSaturated Fat 0 grams unsaturated fat
Ingredients:
- 2 cups all-purpose flour*
- 1 cup salt
- 1 cup water
Instruction:
- Combine the flour and salt in a large mixing bowl.
- Gradually add water while stirring and mixing to form a dough with a Play-Doh like consistency.
- Form the dough into a ball and knead for approximately 5-7 minutes, until the dough is smooth and firm. Additional water may be needed, depending upon humidity. Add a teaspoon of water at a time until the dough reaches the proper texture. On the other hand, if the dough is too sticky, add more flour by the teaspoon until it’s no longer tacky.
- Store the salt dough in a Ziploc bag when it’s not in use to prevent it from drying out.
The Best Easy Salt Dough
These take a few hours to bake and cool, so plan to do the rolling and painting in two separate sessions either morning and afternoon or on two different days. You can make these as ornaments with holes, or just as shapes for the kids to decorate. Skip the holes if you don’t plan to hang them.
Prep: 30min
Total: 150min
Yield: 2
Serving Size: 1 serving
Nutrition Facts: calories 1 kcal, Sugar 1 g, Fat 1 g, Saturated Fat 1 g, Fiber 3 g, unSaturated Fat 2 g, servingSize 1 serving
Ingredients:
- 4 cups flour
- 1 cup table salt
- 1.5 cups water
Instruction:
- Mix the ingredients together in a large bowl using a wooden spoon. When it becomes too stiff to stir, use clean hands to bring the dough together.
- NOTE: If the dough is too wet and sticky, knead in a little more flour, about 1 tablespoon at a time. If it’s too stiff, add a little more water, about 1 tablespoon at a time. There is a big range in the way different flours absorb liquid, so there is a normal range of variation here. It should be easy to work with—soft and not too stiff and not excessively sticky.
- Knead a few times until the dough is uniform and soft, about 3-5 minutes.
- Divide dough into 2 or 4 sections and roll out to about 1/4-1/2 inch thick between two sheets of parchment paper. This will help prevent sticking.
- Cut out with cookie cutters. Transfer shapes to a parchment-lined baking sheet.
- Repeat rolling and cutting out shapes to use up the dough.
- Preheat oven to 250 degrees F.
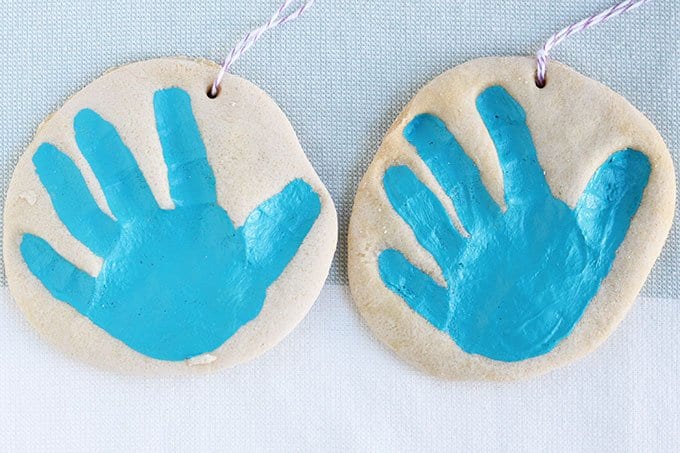
- Do a 4-5-inch circle and press in a child’s handprint if desired.
- Use a paper lollipop stick or a skewer to make a hole to hang as an ornament.
- If making ornaments, bake for 90 minutes to 2 hours; if baking handprints, bake for 2-3 hours. Continue baking both ornaments and handprints as needed until they are until just firm to the touch, checking every 20 minutes. (It’s not a problem if yours take longer than the initial baking time—it varies based on thickness and size…which will likely vary if you are baking these with kids!) They do not need to be rock hard, but should not feel squishy. Handprints will likely take longer than smaller ornaments and may take closer to 4 hours.
- Remove from oven, let cool, and paint if desired with acrylic or washable tempera paint.
- Once paint is completely dry, seal with Mod Podge if desired.
Salt Dough Recipe – for Handprints & Ornaments

An easy salt dough recipe!
Prep: 15min
Ingredients:
- 4 cups all purpose flour
- 1 cup salt
- 1.5 cups warm water
- Clear Glaze Finish or Mod Podge
Instruction:
- Combine all of your ingredients and knead for 10 minutes. If your dough is too dry add a little bit more water in and continue to knead.
- Roll out the dough to a thickness that you’d like your salt dough ornament to be. We like between 1/4 to 1/2 inch thickness.
- Using a large cookie cutter, cut out different shapes for your salt dough ornaments. If making handprints, place the handprints first and then trace around them.
- Have your child place their hand into the salt dough ornament. If the dough is too hard to get an imprint it may be too dry. Continue to knead until smooth. You can also add in a little bit more water.
- Using a straw, make a hole in the top for where you want to hang your salt dough ornament.
- If possible, let the ornaments air dry for a day.
- Preheat your oven to 250 degrees Fahrenheit. Bake for 1-2 hours. If your ornaments are still doughy, put back in for another hour. (It will depend on your thickness how long you need to bake for. The thinner ornaments will take less time but thicker may take more).
- If you encounter too much puffing, roll out thinner ornaments and this will help reduce the puffing. If the ornament is still a bit doughy, bake for longer or let sit out a few days to harden before decorating. The thickness of the dough will determine how long you have to bake them for. We prefer to bake them at 250 degrees Fahreneheit for longer and let them air dry for a few days to prevent puffing.
- Once cool, you can decorate by painting with non-toxic acrylic paint.
- Spray with a clear glaze finish or finish with mod podge. Do this before adding the glitter.
- To make the hand glittery, fill the handprint with glue then sprinkle glitter on top of the glue, shake off the excess and let it dry.
Salt dough recipe
FAQ
Is it better to bake or air dry salt dough?
How long should you cook salt dough for?
How long do you let salt dough dry?
What is the ratio for salt dough?
