When you think of pantry recipes, okonomiyaki might not be the first thing that comes to mind. It certainly wasn’t for Jack and me. Over the last few weeks, we cooked our way through a whole slew of bean recipes, rice recipes, and pasta recipes before it dawned on us that we had everything we needed to make this popular Japanese street food right in our kitchen!
Jack and I first tried okonomiyaki on a trip to Japan nearly ten years ago, and we’ve loved it ever since. If you’re not familiar with it, it’s sort of a frittata-like Japanese savory pancake made with cabbage, scallions, and assorted meat or seafood (Jack often calls it a cabbage hashbrown). This homemade version isn’t entirely authentic, but it’s healthy, delicious, and so darn easy to make. If you’re looking for a fun cooking project that doesn’t require hours in the kitchen, you have to try this okonomiyaki recipe!
The first time I tried okonomiyaki, Jack and I were in Hiroshima. In Hiroshima-style okonomiyaki, layers of fried vegetables, meat, seafood, noodles, and eggs top a thin flour pancake. It’s delicious, but it’s tricky to replicate on a regular stove at home.
Instead, my recipe is a riff on Osaka or Kansai-style okonomiyaki. In this style, the ingredients are all mixed together. Typically, they include cabbage, green onion, and some combination of meat and seafood like pork belly, octopus, squid, or shrimp. Of course, my recipe is vegetarian, so you won’t find any meat or seafood here.
Instead, I mix together lots of shaved cabbage, scallions, and panko breadcrumbs. Then, I tie it all together with a few beaten eggs. It’s super easy and super tasty too.
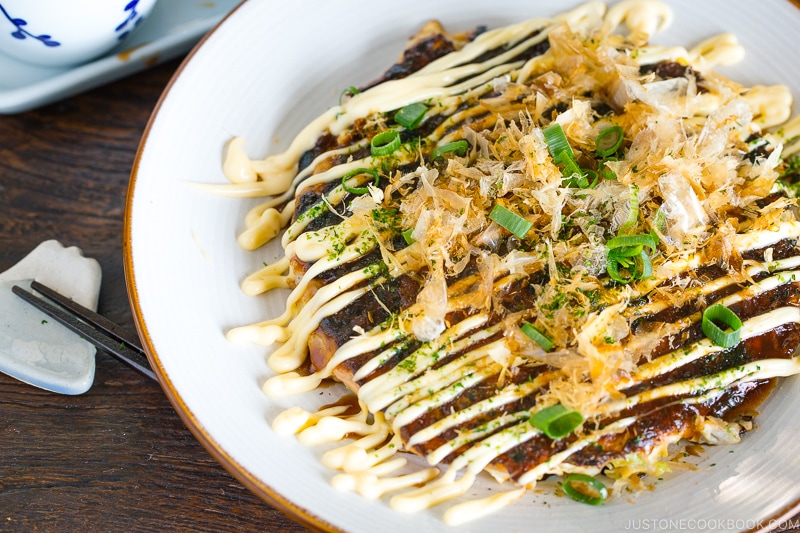
Once you’ve cooked your okonomiyaki, it’s time for the fun part: the toppings! In Japan, it’s traditionally topped with okonomiyaki sauce, drizzles of Kewpie mayo, dried seaweed flakes, and bonito flakes. At home, I like to use these ingredients:
Okonomiyaki
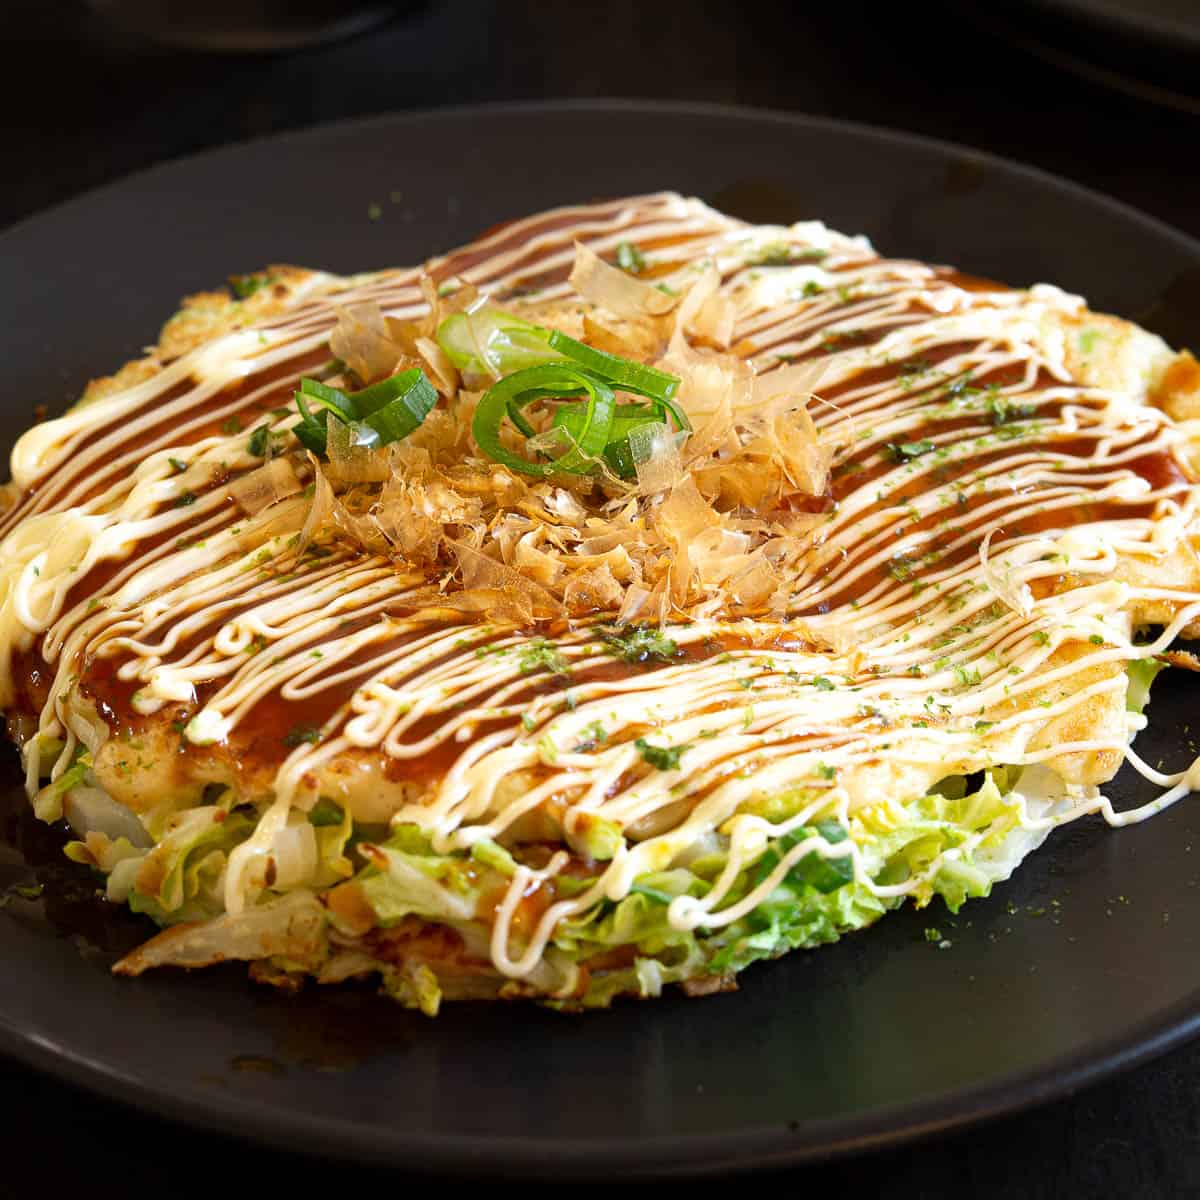
Hailing from Osaka, Okonomiyaki is a delicious Japanese savory pancake made with flour, eggs, cabbage, and protein, and topped with a variety of condiments.
Prep: 30min
Total: 120min
Serving Size: 1 serving
Nutrition Facts: calories 725 kcal, Carbohydrate 62 g, Protein 21 g, Fat 44 g, Saturated Fat 13 g, Trans Fat 1 g, Cholesterol 227 mg, Sodium 643 mg, Fiber 9 g, Sugar 12 g, unSaturated Fat 21 g, servingSize 1 serving
Ingredients:
- 1 cup all-purpose flour (plain flour)
- ¼ tsp kosher salt (Diamond Crystal; use half for table salt)
- ¼ tsp sugar
- ¼ tsp baking powder
- 5.6 oz nagaimo/yamaimo (mountain yam) ((2-3 inches, 5-8 cm))
- ¾ cup dashi (Japanese soup stock; click to learn more)
- 4 large eggs (50 g each w/o shell)
- ½ cup tenkasu/agedama (tempura scraps) ((24 g))
- ¼ cup pickled red ginger (beni shoga or kizami beni shoga)
- 1 head green cabbage ((large; 1.6 lb, 740 g))
- ½ lb sliced pork belly
- neutral-flavored oil (vegetable, rice bran, canola, etc.) ((for cooking the okonomiyaki))
- 1½ Tbsp sugar
- 2 Tbsp oyster sauce
- 4 Tbsp ketchup
- 3½ Tbsp Worcestershire sauce
- Okonomiyaki Sauce (homemade or store bought)
- Japanese mayonnaise
- katsuobushi (dried bonito flakes) ((skip for vegetarian))
- aonori (dried green laver seaweed)
- green onions/scallions
- pickled red ginger (beni shoga or kizami beni shoga)
Instruction:
- {‘@type’: ‘HowToStep’, ‘text’: ‘Gather all the ingredients.’, ‘name’: ‘Gather all the ingredients.’, ‘url’: ‘https://www.justonecookbook.com/okonomiyaki/#wprm-recipe-56722-step-0-0’, ‘image’: ‘https://www.justonecookbook.com/wp-content/uploads/2016/07/Okonomiyaki-Ingredients-NEW.jpg’}
- {‘@type’: ‘HowToSection’, ‘name’: ‘To Prepare the Okonomiyaki Batter’, ‘itemListElement’: [{‘@type’: ‘HowToStep’, ‘text’: ‘In a large bowl, combine all-purpose flour, salt, sugar, and baking powder and mix all together.’, ‘name’: ‘In a large bowl, combine all-purpose flour, salt, sugar, and baking powder and mix all together.’, ‘url’: ‘https://www.justonecookbook.com/okonomiyaki/#wprm-recipe-56722-step-1-0’, ‘image’: ‘https://www.justonecookbook.com/wp-content/uploads/2016/07/Okonomiyaki-1-NEW.jpg’}, {‘@type’: ‘HowToStep’, ‘text’: ‘Peel and grate the nagaimo in a small bowl (I use this grater that I love). Note: I don’t have any issues, but the nagaimo may irritate your skin and cause itchiness. Work quickly and rinse your hands immediately after touching the nagaimo. Nagaimo is very slimy and slippery, so make sure you have a good gripxa0on the nagaimo if you wear kitchen gloves.’, ‘name’: ‘Peel and grate the nagaimo in a small bowl (I use this grater that I love). Note: I don’t have any issues, but the nagaimo may irritate your skin and cause itchiness. Work quickly and rinse your hands immediately after touching the nagaimo. Nagaimo is very slimy and slippery, so make sure you have a good gripxa0on the nagaimo if you wear kitchen gloves.’, ‘url’: ‘https://www.justonecookbook.com/okonomiyaki/#wprm-recipe-56722-step-1-1’, ‘image’: ‘https://www.justonecookbook.com/wp-content/uploads/2016/07/Okonomiyaki-2-NEW.jpg’}, {‘@type’: ‘HowToStep’, ‘text’: ‘Add the grated the nagaimo and dashi to the bowl.’, ‘name’: ‘Add the grated the nagaimo and dashi to the bowl.’, ‘url’: ‘https://www.justonecookbook.com/okonomiyaki/#wprm-recipe-56722-step-1-2’, ‘image’: ‘https://www.justonecookbook.com/wp-content/uploads/2016/07/Okonomiyaki-3-NEW.jpg’}, {‘@type’: ‘HowToStep’, ‘text’: ‘Mix it all together until combined. Cover the bowl with plastic wrap and let it rest in the refrigerator for at least one hour. Tip: Resting the batter relaxes the gluten in the batter, improves the flavor, and makes the okonomiyaki fluffier. Some okonomiyaki shops refrigerate the batter overnight. Meanwhile, you can prepare the okonomiyaki sauce and other ingredients.’, ‘name’: ‘Mix it all together until combined. Cover the bowl with plastic wrap and let it rest in the refrigerator for at least one hour. Tip: Resting the batter relaxes the gluten in the batter, improves the flavor, and makes the okonomiyaki fluffier. Some okonomiyaki shops refrigerate the batter overnight. Meanwhile, you can prepare the okonomiyaki sauce and other ingredients.’, ‘url’: ‘https://www.justonecookbook.com/okonomiyaki/#wprm-recipe-56722-step-1-3’, ‘image’: ‘https://www.justonecookbook.com/wp-content/uploads/2016/07/Okonomiyaki-4-NEW.jpg’}]}
- {‘@type’: ‘HowToSection’, ‘name’: ‘To Make the Okonomiyaki Sauce’, ‘itemListElement’: [{‘@type’: ‘HowToStep’, ‘text’: ‘Meanwhile, gather all the ingredients for the okonomiyaki sauce.’, ‘name’: ‘Meanwhile, gather all the ingredients for the okonomiyaki sauce.’, ‘url’: ‘https://www.justonecookbook.com/okonomiyaki/#wprm-recipe-56722-step-2-0’, ‘image’: ‘https://www.justonecookbook.com/wp-content/uploads/2016/07/Okonomiyaki-Sauce-Ingredients.jpg’}, {‘@type’: ‘HowToStep’, ‘text’: ‘Combine sugar, oyster sauce, ketchup, and Worcestershire sauce in a small bowl. Mix all together until the sugar is completely dissolved.’, ‘name’: ‘Combine sugar, oyster sauce, ketchup, and Worcestershire sauce in a small bowl. Mix all together until the sugar is completely dissolved.’, ‘url’: ‘https://www.justonecookbook.com/okonomiyaki/#wprm-recipe-56722-step-2-1’, ‘image’: ‘https://www.justonecookbook.com/wp-content/uploads/2016/07/Okonomiyaki-5-NEW.jpg’}]}
- {‘@type’: ‘HowToSection’, ‘name’: ‘To Prepare the Other Ingredients’, ‘itemListElement’: [{‘@type’: ‘HowToStep’, ‘text’: ‘Discard the core of the cabbage and then mince the cabbage leaves.’, ‘name’: ‘Discard the core of the cabbage and then mince the cabbage leaves.’, ‘url’: ‘https://www.justonecookbook.com/okonomiyaki/#wprm-recipe-56722-step-3-0’, ‘image’: ‘https://www.justonecookbook.com/wp-content/uploads/2016/07/Okonomiyaki-6-NEW.jpg’}, {‘@type’: ‘HowToStep’, ‘text’: ‘Cut the pork belly slices in half and set aside.’, ‘name’: ‘Cut the pork belly slices in half and set aside.’, ‘url’: ‘https://www.justonecookbook.com/okonomiyaki/#wprm-recipe-56722-step-3-1’, ‘image’: ‘https://www.justonecookbook.com/wp-content/uploads/2016/07/Okonomiyaki-7-NEW.jpg’}]}
- {‘@type’: ‘HowToSection’, ‘name’: ‘To Cook the Okonomiyaki’, ‘itemListElement’: [{‘@type’: ‘HowToStep’, ‘text’: ‘After one hour, take out the batter from the refrigerator. Add eggs, tempura scraps (tenkasu/agedama), and pickled red ginger (kizami beni shoga) to the bowl. Mix until combined.’, ‘name’: ‘After one hour, take out the batter from the refrigerator. Add eggs, tempura scraps (tenkasu/agedama), and pickled red ginger (kizami beni shoga) to the bowl. Mix until combined.’, ‘url’: ‘https://www.justonecookbook.com/okonomiyaki/#wprm-recipe-56722-step-4-0’, ‘image’: ‘https://www.justonecookbook.com/wp-content/uploads/2016/07/Okonomiyaki-8-NEW.jpg’}, {‘@type’: ‘HowToStep’, ‘text’: ‘Add the minced cabbage to the batter, one-third of it at a time. Mix well before adding the rest.’, ‘name’: ‘Add the minced cabbage to the batter, one-third of it at a time. Mix well before adding the rest.’, ‘url’: ‘https://www.justonecookbook.com/okonomiyaki/#wprm-recipe-56722-step-4-1’, ‘image’: ‘https://www.justonecookbook.com/wp-content/uploads/2016/07/Okonomiyaki-9-NEW.jpg’}, {‘@type’: ‘HowToStep’, ‘text’: ‘In a large pan, heat the vegetable oil on medium heat. When the frying pan is hot (400ºF or 200ºC), spread the batter in a circle on the pan. We like thicker okonomiyaki (the final thickness is ¾ inches or 2 cm). If you’re new to making okonomiyaki, make it smaller and thinner so it’s easier to flip.’, ‘name’: ‘In a large pan, heat the vegetable oil on medium heat. When the frying pan is hot (400ºF or 200ºC), spread the batter in a circle on the pan. We like thicker okonomiyaki (the final thickness is ¾ inches or 2 cm). If you’re new to making okonomiyaki, make it smaller and thinner so it’s easier to flip.’, ‘url’: ‘https://www.justonecookbook.com/okonomiyaki/#wprm-recipe-56722-step-4-2’, ‘image’: ‘https://www.justonecookbook.com/wp-content/uploads/2016/07/Okonomiyaki-10-NEW.jpg’}, {‘@type’: ‘HowToStep’, ‘text’: ‘Place 2-3 slices of pork belly on top of the okonomiyaki and cook covered for 5 minutes.’, ‘name’: ‘Place 2-3 slices of pork belly on top of the okonomiyaki and cook covered for 5 minutes.’, ‘url’: ‘https://www.justonecookbook.com/okonomiyaki/#wprm-recipe-56722-step-4-3’, ‘image’: ‘https://www.justonecookbook.com/wp-content/uploads/2016/07/Okonomiyaki-11-NEW.jpg’}, {‘@type’: ‘HowToStep’, ‘text’: ‘When the bottom side is nicely browned, flip it over.’, ‘name’: ‘When the bottom side is nicely browned, flip it over.’, ‘url’: ‘https://www.justonecookbook.com/okonomiyaki/#wprm-recipe-56722-step-4-4’, ‘image’: ‘https://www.justonecookbook.com/wp-content/uploads/2016/07/Okonomiyaki-13-NEW.jpg’}, {‘@type’: ‘HowToStep’, ‘text’: ‘Gently press the okonomiyaki to fix its shape and keep it together. Cover and cook for another 5 minutes.’, ‘name’: ‘Gently press the okonomiyaki to fix its shape and keep it together. Cover and cook for another 5 minutes.’, ‘url’: ‘https://www.justonecookbook.com/okonomiyaki/#wprm-recipe-56722-step-4-5’, ‘image’: ‘https://www.justonecookbook.com/wp-content/uploads/2016/07/Okonomiyaki-14-NEW.jpg’}, {‘@type’: ‘HowToStep’, ‘text’: ‘Flip it over one last time and cook uncovered for 2 minutes. If you’re going to cook the next batch, transfer the cooked okonomiyaki to a plate.’, ‘name’: ‘Flip it over one last time and cook uncovered for 2 minutes. If you’re going to cook the next batch, transfer the cooked okonomiyaki to a plate.’, ‘url’: ‘https://www.justonecookbook.com/okonomiyaki/#wprm-recipe-56722-step-4-6’, ‘image’: ‘https://www.justonecookbook.com/wp-content/uploads/2016/07/Okonomiyaki-15-NEW.jpg’}]}
- {‘@type’: ‘HowToSection’, ‘name’: ‘To Serve’, ‘itemListElement’: [{‘@type’: ‘HowToStep’, ‘text’: ‘Here are the ingredients for toppings: Spread the okonomi sauce on top with a brush or spoon, drizzle with Japanese mayonnaise in a zigzag pattern (optional), and sprinkle with dried bonito flakes (katsuobushi). You can also top with dried green seaweed (aonori), chopped green onions, and pickled red ginger for garnish. Please see the video for this step.’, ‘name’: ‘Here are the ingredients for toppings: Spread the okonomi sauce on top with a brush or spoon, drizzle with Japanese mayonnaise in a zigzag pattern (optional), and sprinkle with dried bonito flakes (katsuobushi). You can also top with dried green seaweed (aonori), chopped green onions, and pickled red ginger for garnish. Please see the video for this step.’, ‘url’: ‘https://www.justonecookbook.com/okonomiyaki/#wprm-recipe-56722-step-5-0’, ‘image’: ‘https://www.justonecookbook.com/wp-content/uploads/2016/07/Okonomiyaki-Ingredients-2-NEW.jpg’}]}
- {‘@type’: ‘HowToSection’, ‘name’: ‘To Store’, ‘itemListElement’: [{‘@type’: ‘HowToStep’, ‘text’: ‘Wrap each okonomiyaki (no sauce or toppings) in aluminum foil and then put it in a freezer bag. Store in the refrigerator for up to 3 days and in the freezer for a month. When you serve, defrost it first and heat it up in a toaster oven or oven. It’s a great quick meal!’, ‘name’: ‘Wrap each okonomiyaki (no sauce or toppings) in aluminum foil and then put it in a freezer bag. Store in the refrigerator for up to 3 days and in the freezer for a month. When you serve, defrost it first and heat it up in a toaster oven or oven. It’s a great quick meal!’, ‘url’: ‘https://www.justonecookbook.com/okonomiyaki/#wprm-recipe-56722-step-6-0’}]}
- {‘@type’: ‘HowToSection’, ‘name’: ‘To Cook Several Okonomiyaki at Once’, ‘itemListElement’: [{‘@type’: ‘HowToStep’, ‘text’: ‘If you have a Japanese griddle with a lid (we call it a hot plate), you can cook several pieces of okonomiyaki at once. Otherwise, I recommend cooking one okonomiyaki at a time in a frying pan.’, ‘name’: ‘If you have a Japanese griddle with a lid (we call it a hot plate), you can cook several pieces of okonomiyaki at once. Otherwise, I recommend cooking one okonomiyaki at a time in a frying pan.’, ‘url’: ‘https://www.justonecookbook.com/okonomiyaki/#wprm-recipe-56722-step-7-0’, ‘image’: ‘https://www.justonecookbook.com/wp-content/uploads/2016/12/Zojirushi-Electric-Griddle.jpg’}]}
Easy Okonomiyaki Recipe – Japanese Savoury Pancakes
Okonomiyaki are Japanese savoury pancakes packed with flavour and SO easy to make! Ready in less than 30 minutes, these ‘as you like it’ pancakes are sure to be the new family favourite.
Prep: 10min
Total: 25min
Yield: 4
Serving Size: 1 serving
Nutrition Facts: calories 161 kcal, Carbohydrate 14 g, Protein 6 g, Fat 9 g, Saturated Fat 2 g, Cholesterol 71 mg, Sodium 181 mg, Fiber 1 g, Sugar 2 g, servingSize 1 serving
Ingredients:
- 4 bacon slices (sliced, fat & rind removed)
- ⅔ cup plain flour / all purpose flour
- 2 tbsp cornstarch / cornflour
- ½ cup warm water
- 1 tsp dashi powder (dissolved in the warm water)
- 3 eggs
- ¼ cabbage (wombok / napa – finely shredded)
- 1-2 spring onion / green onion (sliced (half for batter & half for garnish))
- ½ cup corn (tinned)
- 1 tbsp vegetable oil (for cooking)
- 2 tbsp kewpie mayonnaise
- 2 tbsp okonomiyaki sauce
- 1 tsp seaweed flakes / aonori
- 1 tsp bonito flakes / katsuobushi
Instruction:
- Fry the bacon until cooked through and crispy, then set aside to cool. No need to use oil here, as the bacon will release its own oil as you cook it.
- To make the batter, combine the eggs and dashi powder dissolved in the warm water in a small mixing bowl and beat gently. In a separate large mixing bowl add your all purpose flour and cornflour, then pour over with the egg and dashi stock mixture. Stir and combine until smooth.
- Next, add the shredded cabbage, half of the spring onion, cooked bacon and corn into the batter mixture. Mix until all the dry ingredients are evenly coated (but don’t overmix, we want to keep that cabbage nice and fluffy). There shouldn’t be much excess batter liquid at the bottom – if there is, just add a little more chopped cabbage and mix through gently.
- Heat a large frying pan over medium heat. Add in the vegetable oil and allow to heat up. Scoop out the mixture onto the pan, aiming for a circle shape about 10 cm / 4 inches wide. Cook each pancake for a few mins per side, until lightly browned on both sides.
- Transfer your freshly cooked pancakes to serving plates, then top with drizzles of kewpie mayonnaise and okonomiyaki sauce. For even better tasting okonomiyaki, top with sprinklings of dried seaweed flakes, bonito flakes and a few slices of green onion to taste. You can also optionally top with the pickled ginger and Japanese 7 spice here.
Okonomiyaki

This okonomiyaki recipe is SO easy and fun to make! It’s a frittata-like savory Japanese pancake with a cabbage hashbrown-like texture.
Prep: 10min
Ingredients:
- 3 packed cups finely shredded cabbage (about ½ medium*)
- 1¼ cups chopped scallions (about 1 bunch)
- 1 cup panko breadcrumbs
- ¾ teaspoon sea salt
- 3 eggs (beaten)
- Extra-virgin olive oil (for brushing)
- Vegan Worcestershire sauce ((Annie’s recommended))
- Mayo ((Sir Kensington’s or Kewpie recommended))
- Sesame seeds
- Pickled ginger
- ½ sheet nori (sliced**)
- ½ cup microgreens (optional)
Instruction:
- In a large bowl, combine the cabbage, scallions, panko, and salt. Gently mix in the eggs. (Note: the mixture will be very loose and cabbagey, not like a flour pancake batter. If it’s very dry, let it sit for 10 minutes).
- Heat a nonstick skillet over medium heat. Brush the skillet with olive oil and use a ¼ measuring cup to scoop the cabbage mixture into the skillet. (It’s ok if it doesn’t seem cohesive, it’ll bind together as the egg cooks). Flatten gently with a spatula so that the mixture is about 1/2 inch thick. Cook 3 minutes per side, or until browned, turning the heat to low as needed. Repeat with the remaining mixture, wiping out the skillet and brushing more oil, as needed.
- Drizzle the okonomiyaki with Worcestershire sauce and thin strips of squeezed mayo. Top with sesame seeds, pickled ginger, and nori. Sprinkle with microgreens, if desired. Serve hot.
How To Make Okonomiyaki (Recipe) お好み焼きの作り方(レシピ)
FAQ
What is okonomiyaki batter made of?
What is usually in okonomiyaki?
What can I use instead of okonomiyaki flour?
What are the two types of okonomiyaki?
