:max_bytes(150000):strip_icc()/__opt__aboutcom__coeus__resources__content_migration__serious_eats__seriouseats.com__2018__01__20180112-duck-breast-vicky-wasik-15-f6ffef51a20f45b19a672ab2acba365b.jpg)
How to Cook a Duck Breast
Cooking duck breasts is easy once you get the hang of it. This recipe works with any duck or goose breast, wild or store-bought.
Prep: 20min
Total: 35min
Yield: 4
Serving Size: 1 serving
Nutrition Facts: calories 287 kcal, Protein 45 g, Fat 11 g, Saturated Fat 3 g, Cholesterol 174 mg, Sodium 129 mg, servingSize 1 serving
Ingredients:
- 4 duck breasts ((breasts from two ducks))
- Salt
- 1 teaspoon duck fat or olive oil
Instruction:
- Take the duck breasts out of the fridge. If you are using a domestic duck or a very fat wild duck, score the skin (but not the meat) in a cross-hatch pattern, making the cross-hatches about 1/2 inch across; this helps the fat render and will give you a crispier skin. Salt it well on both sides, then let it sit on a cutting board for at least 15 minutes and up to 45 minutes for a goose breast.
- Pat the duck breasts dry with paper towels. If you are cooking a domestic duck or a very fat wild duck, put 1 teaspoon of duck fat or cooking oil in a large pan; Lay the breasts skin side down and use them to smear the fat all over the surface of the pan. Turn the heat to medium-high. Yes, you read that right: Don’t preheat the pan. You want as much fat to render out as possible, so start with a cool pan. If you are working with normal wild duck breasts, i.e., skinny ones, heat the pan over high heat for 1 minute, then add 2 tablespoons of duck fat, lard or some other oil. Let this get hot, but do not let the fat smoke. Only then do you lay the duck breasts in the pan, skin side down. Either way, once the duck breasts start cooking, you will notice the “tails” of skin and fat from the head and the tail side of the fillet contract immediately. As the skin contracts, you will sometimes get a little oval patch on the tail end of the breast that curls up and doesn’t make contact with the pan. Use your tongs to press down on this part for 30 to 60 seconds. This gives you a more even sear.
- Let the pan do its job. Cook at a jocular sizzle — not an inferno, not a gurgle. Think about how bacon sounds in the pan when you cook it, and you have the right idea. How long? It depends. I like my duck medium-to-medium-rare. To do this with small ducks like teal or ruddy ducks, you need only about 3 minutes on the skin side, and you might want to keep the heat higher. Medium-sized ducks like wigeon, gadwall or wood ducks need 3 to 5 minutes. Mallards, pintail, canvasbacks and domestic ducks need between 5 and 8 minutes. If you are cooking a goose breast, you will want the heat on medium-low and you’ll need to cook the skin side a solid 10 to 12 minutes. The key is to let the breast do most of its cooking on this side — it’s the flattest, and will give you that fabulously crispy skin we all know and love. Again, I repeat: When you cook a duck breast, 3/4 of the total cooking time is on the skin side.
- Turn the breasts over. When? Follow the guidelines above, but also use your ears: You will hear the sizzle change; it will die down, just a bit. That’s when you turn. Lightly salt the now-exposed skin immediately. Doing this seems to absorb any extra oil and definitely gives you an even crispier skin. Let the ducks cook on the meat side for less time. I recommend: 1 to 2 minutes for small ducks; 3 to 4 minutes for medium ducks; 4 to 6 minutes for large wild ducks and domestic duck; 5 to 7 minutes for geese. More than mere time, however, you need to just use The Force to know when your duck is ready. Not in tune with The Force? The next best thing is the finger test for doneness. Use this to determine when you’re almost ready. My advice is to go to the next step when your duck breasts are rare.
- Now “kiss” the thick side of the breasts by standing two halves against each other. You will notice that duck and goose breasts plump up and contract as they cook. One side of the fillet will be wider than the other, and this side will need some heat. Just tip the breasts on their sides and cook for 30 to 90 seconds, just to get some good color.
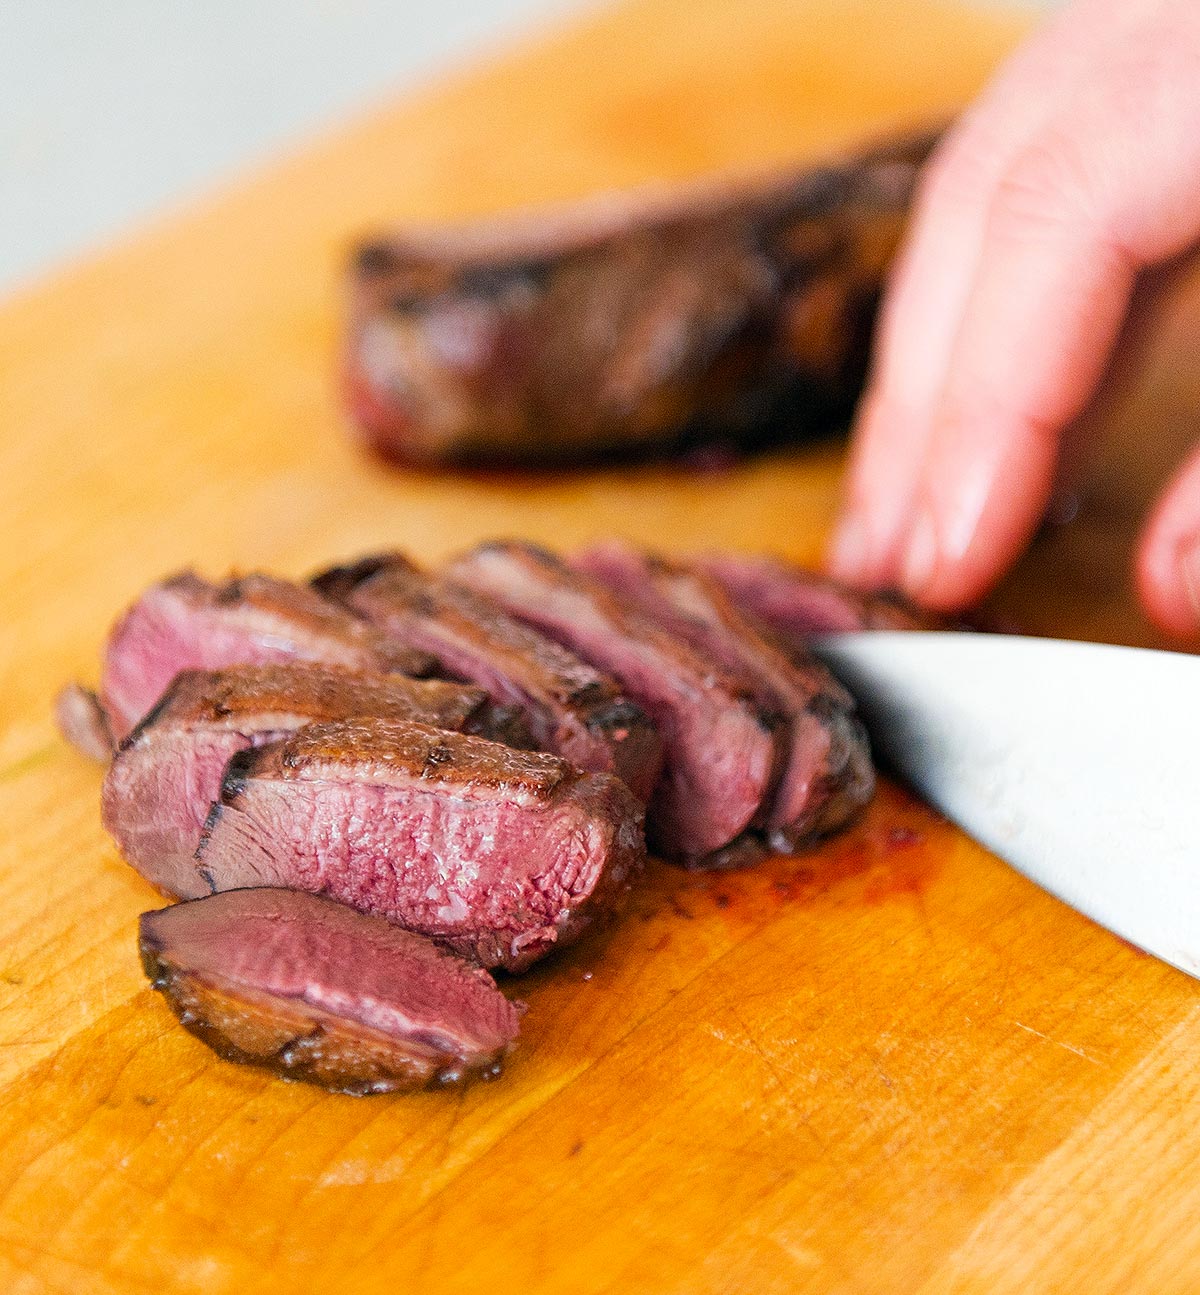
- Take the duck off the heat and let it rest on a cutting board, skin side up. This would be a good time to grind black pepper over it. Teal need only need a minute or two rest, while big Canada geese might need 10 minutes. Everything else benefits from about a 5 minute rest. A duck breast is just like a steak: If you don’t rest it, the juices will run all over your cutting board — and not down your chin, where they should be. You can slice the breast from either end, either side up. You can get thinner slices by starting at the meat end, but you lose a little of the crispiness of the skin. If you are serving a whole breast, always serve it skin side up, with its sauce underneath.
How to Cook Perfect Duck Breast | Gordon Ramsay
FAQ
What pairs well with duck breast?
What To Serve With Duck Breast
- Mashed potatoes and green beans. This is a quick and easy side dish that pairs well with the flavour-packed, rich duck breast. …
- Spinach and mushroom salad. …
- Balsamic-roasted vegetables. …
- Duck fat-roasted Brussel sprouts. …
- Polenta fries. …
- Asparagus and leek risotto. …
- Honey-roasted carrots. …
- Fried egg.
What is the best thing to soak duck breast in?
A litre of cold water mixed with ¼ cup of coarse salt and¼ cup of brown sugar makes the perfect waterfowl brine. Soak duck and goose meat in the brine for 8 to 12 hours, and you’ll see the difference in color. Much of the blood stored in the meat is drawn out by the brine.
Do you eat the fat on a duck breast?
To cook duck breast correctly, you have to render that fat, which helps you get that skin crispy. The end result is three textures in one – crispy skin, melt-in-the-mouth fat and juicy, tender meat underneath. Slather it with a sauce of your choice or just eat it straight off the pan as I do. It’s heaven.
Do you soak duck breast before cooking?
Yes, brining duck meat helps balance the moisture in the meat and mellow any gamey flavor. Mallards and other large whole birds must brine for a minimum of 12 to 15 hours. They won’t be harmed by soaking for 24 hours in a brine, but any longer than that may make them too salty.
